So your project is all put together and now you need to finish it? Here’s 5 tips to help you along in the process.
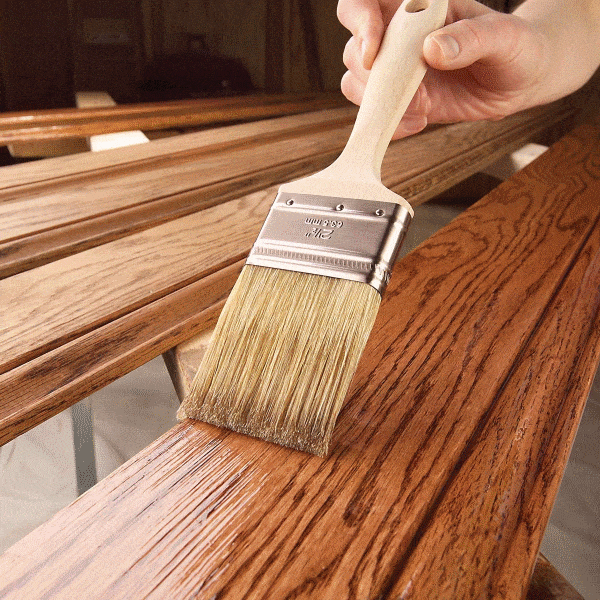
1. Start with a good brush.
The most important thing to consider in finishing is to start with a very good brush, and yes, that translates to expensive.
When giving your deck chairs a coat of paint in the spring time, any inexpensive brush will do the job. However when you’re finishing a project which will be looked at closely in your living room or rec room, buy a very good quality brush, and use it for nothing else but good projects.
You should have a very good brush for oil based painting, and another very good brush for water based or latex paints.
Properly cleaned, and used for nothing else, these “special” brushes will last a lifetime. I still have brushes my dad used.
Proper brush cleaning is a necessary part of maintaining your brushes.
2. Use different techniques for different types of coating.
Different types of coatings require different brushing techniques.
For instance, water based coatings should not be over brushed. They tend to dry or “set-up” more quickly, and if you go back over parts of the job which have been coated too long ago, you will be left with a job which has a lot of quite evident brush strokes.
Where as, an oil based varnish is much more forgiving in this regard. Advice can be acquired from a painting expert at your local paint store. But really nothing is a substitute for your own experience.
Practice on a piece of wood to see how the different types of coatings react. It’s better to leave poor quality finishes on scrap test pieces, instead of on the project you so meticulously created.
3. Prop your project up.
When painting the bottom of the sides/front of your project, it can get messy – your brush can touch the ground or floor and can pick up dust, dirt or many other things, to say nothing of the mess you can make.
Try this. Cut lengths of 2 x 4’s about 1′ long – 8 in total. Make four “T” arrangements by driving 3″ nails through the middle of one of the pieces and into the end of one of the others.
Place one of these assemblies under each leg of your project – the top of the “T” down and rest your project of the now up, bottom of the “T”.
You can now easily paint the legs all the way to the bottom, and if your brush goes past the bottom of the leg, it will only touch the support assembly, picking up no dirt or dust.
4. Use these brush clean-up techniques.
For SURE-FIRE EASY BRUSH CLEAN-UP when using oil based coatings, let brush soak in paint thinner for about 1/2 hour. Press bristles against sides of the container to remove most of the thinner.
Then in another container – small glass jars work well – disolve 1 heaping tablespoon of T.S.P. (trisodium phosphate) in enough water to cover the bristles – about 8 to 12 oz.
With your fingers, spread bristles and allow solution to get thoroughly into the brush. Let brush soak for about 1/2 hour.
Then wash brush a couple of times with soap and water. Rinse well under running water and shake out almost all of the water.
Wrap the bristles with a scrap of white paper big enough to go around the brush and overlap.
Fasten snugly with adhesive tape or a rubber band and hang up to dry. When dry, your brush will be ready for the next project and many more.
You won’t have to throw away many brushes any more.
5. Use a large box for overspray.
When you use the spraying method of finishing your project be it a sprayer or spray can, over spray can get on all sorts of things which you hadn’t planned on, making the area cleanup very difficult if not impossible.
For your own portable and reusable spray paint area, save one of those big cardboard boxes in which refrigerators, stoves or living room furniture are shipped. Cut off one of the large sides, and tape the rest of the sides closed with duct tape.
With the box sitting on its side and on your bench or table with the open side towards you, place your project in the open side of the box well back from the front edge and safely paint to your heart’s content.
Use duct tape on all seams so that no paint sneaks through to the surrounding area. Virtually all of the paint will be contained by the box, and when the insides of the box dries, it’s ready for the next job and your shop/garage/basement is not all messed up with overspray.