Silicone and grout are actually two different things, although you can sometimes use silicone in place of grout.
There is also a difference between grout and caulk, but these terms are sometimes used interchangeably.
Anyways, let’s clear this up and get into the details.
Contents
- Grout vs. Caulk, What’s the Difference?
- What Is Silicone?
- The Advantages of Using Silicone for Grout Over Other Materials
- Quick Guide to Applying Silicone Grout
- Advantages of Using Silicone Grout over Standard Grout
- Pure Silicone vs. Siliconized Latex Grout
- Advantages of Silicone Caulk Over Latex or Acrylic
- What If Your Silicone Grout/Caulk Isn’t Drying?
- Removing Silicone
- Other Uses for Silicone Grout/Caulk
- Can You Paint Over Silicone Caulk?
Grout vs. Caulk, What’s the Difference?
First, let’s take a look at the differences between these items:
- Grout is concrete-like and sandy in texture, and it is used in between tiles to keep them together and keep out moisture.
- Caulk is very similar to grout except it’s flexible and not sandy in texture. It’s usually made out of either silicone, latex, or acrylic.
As a general rule, grout is used for projects requiring rigidity/structural integrity, while caulk is used for projects requiring flexibility.
So, when people use the term “silicone grout,” they’re talking about a caulk-like substance that is made out of silicone and not acrylic or latex.
Caulk is flexible and absorbs moisture, whereas grout can crack. Caulk can even dry out or shrink over time, which is why it isn’t recommended for large installations or as a replacement for grout.
In other words, you should use caulk for some projects and grout for others, so you usually cannot use grout over caulk if the caulk needs to be replaced.
Replace grout with grout and caulk with caulk for the best results.
What Is Silicone?
Silicone is a type of sealant that does great around sinks where metal and tile come together, such as in showers and other places.
If actual grout gets chipped, use grout to replace it. When comparing caulk and silicone, remember that caulk is used mostly for sealing joints, as opposed to silicone, which is used in many tasks, including sealants, lubricants, and adhesives.
Essentially, there are many types of materials used in products called caulking, as mentioned earlier, whereas silicone is a silicone-based polymer and actually has other uses besides being a sealant.
Silicone is rubbery and heat-resistant, although you can also find it in liquid form.
Some of the characteristics of silicone include:
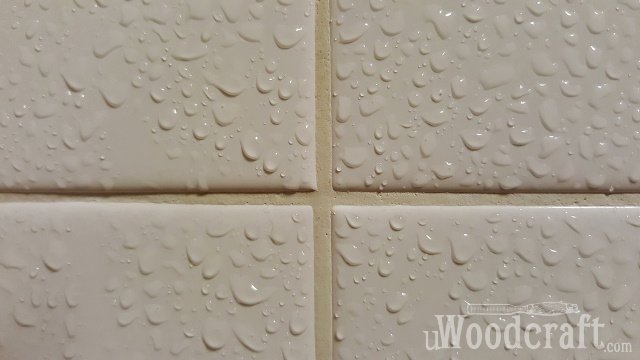
- It has the ability to make watertight seals.
- It is highly gas-permeable.
- It is nontoxic and low-taint.
- It is resistant to microbial attacks and therefore has a long shelf life.
- It is flexible, airtight, and watertight.
Although caulk and grout are terms that people use to mean the same thing, they are actually two different materials, even though they are both sealants.
The Advantages of Using Silicone for Grout Over Other Materials
If you’re wondering about silicone grout/caulk compared to other types, just consider some of the benefits of silicone, which include:
- Since it is flexible and not concrete-like, it is perfect for using on corner edges.
- It is extremely durable.
- It has a smooth texture and is just a better overall sealant.
- Silicone can withstand a lot of pressure.
Other types of grout can crack under pressure or even when it gets old, but silicone won’t do that. It bends when it needs to bend and stays firm and smooth when it needs to do that as well.
Quick Guide to Applying Silicone Grout
Using silicone is also very easy, but since each brand is a little different, you might want to read through the instructions thoroughly before you get started.
To get started, make sure you clean all of the gaps between the tiles with soap and water, then leave it to dry.
Next, make a hole in the nozzle and load it onto the gun.
Place masking tape about 1/4 inch above and below the gaps in the tile.
When you apply the silicone, apply pressure and go slowly. Keep using the same amount of pressure the entire time, and don’t stop applying the silicone until you get to the very end.
Remove the masking tape as soon as you’re done applying the silicone. Otherwise, it will be much more difficult to remove.
Wait for 24 hours to let the silicone grout dry completely, then pat yourself on the back and tell yourself you did a great job!
Advantages of Using Silicone Grout over Standard Grout
The main advantages to Silicone Grout over Standard Grout are 1. Its flexibility (in projects where flexibility is beneficial), and 2. possible increase in ease of installation. Because you’re using the same product as both grout and caulk, the job can often be completed more quickly and easily,
If you use silicone, you don’t need to apply anything over it because silicone is a sealant first and foremost, and it is waterproof as well.
Pure Silicone vs. Siliconized Latex Grout
There are also two types of silicone grout: 100% silicone and siliconized latex.
With 100% silicone grout, try to stick with jobs that consist of vents and pipes, and any structure made out of nonporous materials, as well as plumbing fixtures. You also need to stay away from using it on masonry or wood.
- Pure Silicone Pros: very flexible and durable, and it won’t crack.
- Cons: rather expensive and has limited options when it comes to color. It can be sanded or painted, and when it cures, the smell is sometimes bad.
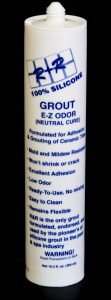
- Price: Around $4.50 or more per tube.
With siliconized latex, you can do almost anything you can do with 100% silicone except you cannot use it on plumbing fixtures.
- Siliconized Latex Pros: very durable and flexible and can be cleaned up easily with water. It also comes in tons of colors.
- Cons: it cannot be sanded.
- Price: Around $3.50 and up per tube.
Advantages of Silicone Caulk Over Latex or Acrylic
Silicone caulk does indeed have advantages over latex or acrylic caulk. The joints of the shower tray and the bath are great places to apply silicone, mainly because it does well in places where pressure shifts might cause cracking.
If you need a seal on two different objects on a different plane, silicone is what you want.
In your attic, when you decide to put down insulation, any gaps left behind need to be sealed up properly. Silicone does a great job at this task.
When you use silicone in your attic, air won’t get through the gaps and insects won’t be able to get through either.
Silicone caulk can be used on your floors as well. You can use it to seal up gaps in the floorboards and maybe even the areas where the walls meet the floors.
You can use silicone to fill in gaps in walls, including walls made out of cement or even brick. This will make the walls even and flat once again.
Cracks and gaps, as well as holes that have been left after screws and nails have been removed, can be filled in with silicone caulk.
It can be used for both external and internal walls, as well as many other DIY chores.
When you install brand-new windows, tiny cracks and gaps often result, and silicone is the perfect way to get rid of them. Use them on older windows as well, because older windows often have caulk that is worn down and isn’t as effective as it once was.
Finally, any area that needs to be sealed off from water and needs to be made watertight can benefit from the use of silicone caulk.
This means the areas around sinks and bathtubs, as well as shower cubicles and the finished edges of wall tiles.
What If Your Silicone Grout/Caulk Isn’t Drying?
Sometimes silicone caulk doesn’t dry like it’s supposed to, but there are solutions for this problem. The first thing to keep in mind is that humidity won’t affect the curing (drying) process because this process requires water to be completed properly.
If the caulk is sticky and isn’t dry after the recommended waiting time – usually 24 hours – it is usually due to the silicone tube having expired. When silicone caulk expires, it will not dry properly and should be replaced.
Can you make your silicone caulk dry faster? In some ways, yes, and these tips and recommendations can help do just that:
- Use a catalyst to make the process go faster. These are super inexpensive (usually around $10) and don’t take much to work properly.
- Consider adding an accelerator, such as distilled water, which you can add to the caulking right after application. Use one teaspoon of water for every pound.
- If you find a product that says “quick drying” on it, buy it!
- Make sure all of the excess silicone is removed with a putty knife. Otherwise, there will be more silicone to dry, which will automatically take longer.
- Open any windows and doors near the caulking area so the breeze and fresh air can help the caulk dry faster.
- Try to find low-temperature caulk if you can, as it will dry faster in conditions that are damp or cold.
- Use either fans or dehumidifiers around the area being caulked to help it dry quicker.
- When you store unused silicone, don’t store it in extreme temperatures.
- When you’re done caulking, wipe the area down as much as possible to remove any excess water that can keep it from drying quickly.
While dampness and humidity can help silicone dry faster, never apply direct heat to the caulked item. It won’t work and may even make things worse.
You should also check the manufacturer’s instructions because while some silicone dries after 24 hours, it can actually take up to 10 days for your caulking to dry completely.
Removing Silicone
If you need to remove silicone caulk to apply new silicone – or for any other reason – you have to start by thoroughly cleaning the tub or shower first. A clean tub or shower is simply much easier to work with.
Choose a loose silicone strip and grab ahold of it. Then, pull gently until the entire strip has been removed.
You may have to use a little more force if you’re removing strips around joints.
After all of the strips have been removed, make sure you scrub the areas where the caulk once was to get rid of any residue or debris.
These steps are important because wet silicone never sticks to dry silicone, which means you cannot place new silicone on top of older silicone.
In fact, nothing sticks to silicone – not even silicone!
For silicone to dry properly, the temperature needs to be between 40 degrees and 100 degrees Fahrenheit, with a humidity level of 5% and 95%. As you can see, silicone dries well in a wide range of temperatures and humidity levels.
Other Uses for Silicone Grout/Caulk
Contrary to what many people think, you can use silicone caulk for far more than just showers and bathtubs. For instance, take a look at the following uses for silicone:
- All types of appliances
- Automobile parts, including engines, gaskets, and so on
- Caulking cracks and joints
- Electronic devices, including cables and sensors
- Leveling surfaces by filling in holes
- Sealing aquariums, artwork, glass-on-glass applications, and many others
- Sealing or bonding glass, plastic, and metal objects
In fact, if you use your noggin, you can come up with all sorts of tasks that will be made much easier with a little silicone caulk. Since it’s waterproof and is a great sealant, it’ll be simple for you to come up with dozens of uses on your own!
Can You Paint Over Silicone Caulk?
Yes, you can. Once your silicone caulk has dried, apply a thin layer of siliconized acrylic latex caulk and allow it to dry thoroughly before moving onto the next step.
Next, take a paint brush and some oil-based primer and run the brush over the top layer of caulk.
You may have to place two coats of the primer, but remember to let each coat dry thoroughly before applying the next one.
When you paint the caulk, make sure you’re using an oil-based paint. Paint it any color you like, but make sure you abide by all of the directions described in the packaging.
If you pay attention to the instructions and follow them to the letter, you should be able to paint over the silicone caulk successfully and have it look completely natural.
Silicone caulk or grout is not difficult to work with and is definitely one of your better options when it comes to various bathroom tasks, so keeping some of this product around is a smart thing to do.