Every project goes more smoothly if you have the proper tools & materials.
Assemble everything you need (listed below) and have it readily available.
This ‘how-to’ will give you all the information you need to remove existing wallpaper.
Quick Note on ‘Strippable’ Wallpaper
If the wallpaper you want to remove is fairly new, it may be ‘strippable’ wallpaper, which can be removed without water or chemicals.
To check if it is strippable, take your putty knife and left up the wallpaper at a corner seam.
If it lifts and pulls away easily, you are a very lucky person.
Required Tools and Materials
- Wallpaper remover/stripper
- Drop cloths (plastic is preferred)
- Masking tape
- Old towels
- Putty knife
- Spray bottle
- 80 grit sandpaper
- Protective gloves & goggles
Optional Tools and Materials
If you happen to tear or damage with wallboard when removing the wallpaper, you will need the following to repair:
- Spackling compound
- Putty knife
- Stepladder (if necessary)
Step 1: Preparation
Make sure everything is removed from the walls: pictures, shelves, outlet/switch covers, etc. – including nails & picture hangers.
Move anything that might get messy, like furniture or plants. If you can’t move it, cover it with a plastic drop cloth.
Place some old towels along the baseboards and lay a plastic drop cloth over that.
Tape the drop cloth to the baseboard so it won’t slide around while you’re working on it.
Step 2: Removing the Paper
You will need to soak a section of the wallpaper with the liquid wallpaper remover.
Read the manufacturer’s instructions on the bottle to ensure you mix the proper quantity of water & solution. (Always wear protective gloves and goggles when working with chemicals.)

- Pour the water and solution into your spray bottle and begin saturating a small section of the wallpaper. (Don’t spray a large area – it will more than likely dry before you get to it.)
- Give it a few minutes to soak in.
- If you don’t think it is soaking in very well, or if the wallpaper is really old, you can help it along by swiping the sandpaper over it a few times.
- Depending on the manufacturer’s instructions, you may need to saturate the wall a few times and let it set for up to 30 minutes.
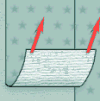
- You want to pull UP at a 45° angle when removing the wallpaper. You may be able to pull off an entire section, but more than likely it will come off in strips.
- If some drywall (or sheetrock) comes up when you are removing the wallpaper, it’s okay. Stop pulling and saturate that area a little more with the wallpaper remover. We’ll show you how to fix those tears later.
- Repeat 1 through 5 until your wall is free of wallpaper.
Step 3: Repairing the Wall
Little tears in the drywall can easily be repaired.
- With your putty knife, scoop out some spackle compound and slather it over the tear.
- Completely cover the damaged area with spackle and scrap off any access with the putty knife. You want as smooth a surface as possible.
- Allow the spackle to dry completely.
- Take your sandpaper and sand over the entire area until baby smooth. (Any lumps or creases will appear through the new wallpaper or paint that you apply.)
- You are ready to continue.

