So you’ve woken up to your floor of ceramic tiles popping up, cracking, buckling, tenting, and generally causing a mess?
Why Do Ceramic Tiles Pop Up and What Causes Tile to Buckle?
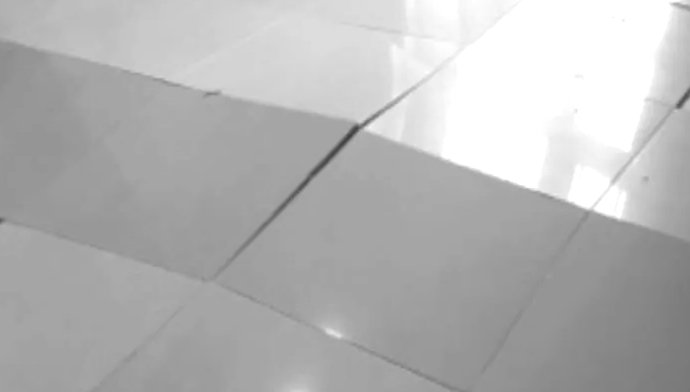
Generally, popped up and buckled tiles are caused by seasonal/environmental expansion and contraction of the various materials used in the construction of your home.
In a proper installation, this expansion and contraction is accounted for with:
- Expansion Joints – these are joints within the tile installation with space to accept movement.
- A Perimeter Gap – This is space between the tile installation and the surrounding materials.
- Flexible Adhesive/Grout – these are adhesives and grouts which allow some movement in their installation.
If the tiles were not properly installed with these methods and materials, expansions/contractions can cause the tiles to push against each other.
At this point, they have nowhere to go but up!
What Can You Do To Fix Popped Up Tiles?
Okay, so you know what causes tiles to pop up, but what can you do about it?
Unfortunately, because popped-up tiles are generally caused by poor installation, the only permanent solution is usually to replace all the tiles.
However, as a temporary fix, you can replace individual tiles.
Replacing Single Popped Up Tiles
Here’s a good video showing how to replace a cracked tile which should apply to most situations where you’re replacing individual popped up tiles:
Some notes to keep in mind:
- The biggest issue with replacing a damaged tile is finding a new matching replacement tile. Hopefully, you have extra tiles from the original installation or have a source for purchasing one.
- Try bringing your old tile to a reputable tile store to find a match.
- You can use a utility knife to cut out any remaining grout to make gaps between any tiles you’re removing and tiles you don’t want to remove.
- Carefully use a chisel to remove any attached tile making sure not to loosen the other tiles.
- Clear out all the adhesive and pieces and wipe the area with a wet sponge to remove dust and damp the wood to help it bond to the adhesive.
- Apply your new adhesive.
- Create Notches in the adhesive to create a stronger connection.
- Make sure the tile is line up properly and leveled.
- Try to find matching grout.
- Apply the grout with a float at a slight diagonal to the joint being grouted.
- Once the grouting is done, use a wet sponge to remove excess grout.
- Keep away from the newly installed tile for 24 hours.
- Wipe away the haze of grout residue with a wet sponge, then buff with a dry sponge.
Removing Your Current Popping Up Tile Floor
If you’re looking for a more permanent solution, the first step is going to be removing your current improperly installed floor.
Here’s a useful video on removing your current tile floor with a hammer and chisel.
But if you have a large area of tile to remove, and are willing to spend a little money to save time, you might want to get your hands on a hammer drill with a chisel attachment as seen in this video.
Some notes to keep in mind removing your old tile:
- Never use a sledgehammer to remove tile. You risk damaging the underlying structure of your floor.
- Use tape to block the space under your doors to prevent tile pieces from moving into other rooms.
- Clean the area to prepare for the removal job.
- Use heavy-duty demo bags to dispose of the removed tiles.
- Use small hand hammers to break up the installed tiles.
- When applying tile, make sure both the adhesive and the surface aren’t dry to ensure a proper bond.
- Be sure to wear the appropriate safety equipment (eye protection, etc.).
Installing a New Tile Floor
Once you’ve removed your old floor, you’re now ready to install a new one. Here’s a helpful video which will get you started:
Some notes to keep in mind installing your new floor:
- The first factor in a successful tile installation is having a solid substrate (sub-floor) to install it on.
- You can install tile onto plywood, but the best surface to install tile onto is cement board.
- Install the cement boards in full sheets where possible.
- Use flooring screw to attach the substrate. Stagger the screw locations to add stability.
- Buy 10-20% more tile than you plan on using to cover for mistakes and to ensure you have spares.
- Start you tile installation layout at the center of the room.
- You never want a grout line in the center of a high-traffic area, as it will receive excessive traffic/wear. You want the stronger tile to take the brunt of this wear.
- For thinner tile, you might be able to use a snap cutter to cut your tiles. For thicker tiles or for a larger job, you’ll want to rent or buy a wet saw.
- Use the notch trowel to create ridges in your adhesive. These ridges produce a suction effect when the tile is pressed into them.
- Use plastic tile spacers to make an even grout line.
- Only make as much grout as can be applied in 30 minutes, as it dries quickly and can no longer be used.
Replacing Tiles in a bathroom or kitchen isn’t as hard as people think it is. The only thing you have to make sure of is that you have the proper tools, and patience of course.
I’ve replaced tiles in multiple customers bathrooms with huge success. They always loved it. But I like to talk to the customer while I’m doing the install. It helps make the customer feel more comfortable with someone tearing up their bathroom, and perhaps they can learn something about home remodeling also. But if you are going to attempt to do this kind of project on your own, do make sure you buy extra tiles, as the article also says.
Good news is, if you mess up, you can always just replace that one tile, and put another one down in it’s place. If you are not good with tools or with fragile items, I would suggest hiring a handyman or some time of contractor.