When the finish on a hard wood floor wears thin, the wood underneath can easily become stained by various spilled liquids.
Sanding the stain out may not work, because the stain can work in deep enough to show through even after substantial sanding. Replacing the flooring is the best alternative and fortunately not a very difficult one.
Oak flooring has been made in a standard size for many years and new pieces from your local supplier will fit well where the stained pieces were.
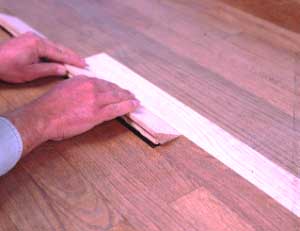
First determine that your oak flooring is standard sized tongue-and-groove flooring, 3/4 x 2-1/4″, by lifting a heat register and measuring the ends of exposed pieces.
If your flooring is different you can adapt the techniques given here to suit, but you may need to have special replacement pieces made for you by a cabinet shop. Determine how many pieces you need to replace, and buy the replacements at a home supply or from a flooring business.
1. Remove the Old Flooring Sections
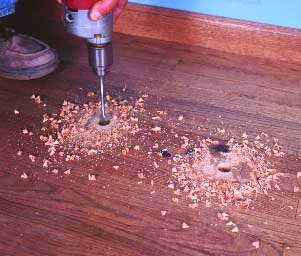
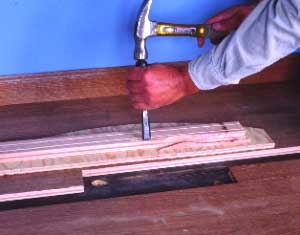
Bore 1″ diameter holes close to the ends of the pieces to be replaced as in photo 1. Use a spade bit, center the hole on the width of the boards and bore only through the flooring, not the subfloor.
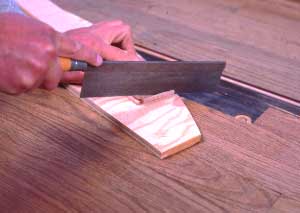
Use a circular saw to make cuts connecting the holes, as in photo 2. Begin each cut with a plunge cut just ahead of one of the holes, and about 1/2″ off the center of the board width.
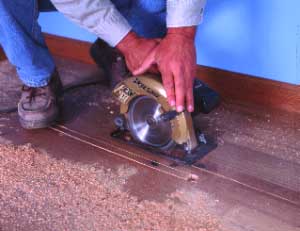
To make the plunge cut, first set the depth of cut on your saw to 3/4″. Holding the guard in its open position with a finger, rest the front toe of the saw platen on the floor with the rest of the saw tilted up off the floor.
Start the motor, and slowly plunge the spinning blade into the wood. Then push the saw until the blade breaks through the other hole.
With an old chisel and a hammer, chop and pry at the pieces of flooring to remove them as in photo 3. Nails are usually placed where the tongue of the flooring meets the body of the piece, and they are angled in at 45 degrees.

Break the wood away from these and pull them out with your hammer or a pliers.
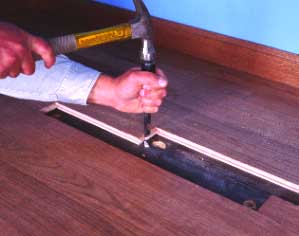
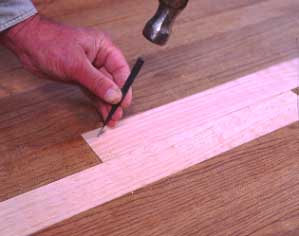
Most flooring has tongues and grooves on the ends of the flooring as well as along the edges. Chop off exposed tongues on the remaining flooring so they will be out of the way when you fit in the new, as in photo 4.
You may find rosin or felt paper under your flooring, which will probably get cut up in the process of replacing the wood. It’s not necessary to replace this paper in the area of your repair, but be sure that you clean all chips and dust that get under it so that your new flooring will lie flat.
2. Prepare The New Flooring Strips
Carefully cut to length your new pieces of flooring so that the ends are square and the fit along the length is snug.
To make square cuts on the ends, use a table saw with a miter gauge. Or, use a miter box and hand saw. Make the cut with your circular saw using a 90 degree guide to ensure that the cut is square.
So that the new pieces will fit into place, you must remove the lower portion of the groove on the groove edge of each piece of flooring. This is easily accomplished with a rip cut on a table saw, or you can chop it off with a chisel as in photo 5.
Place the piece upside down on scrap plywood, then work your way down the piece from one end to the other making cuts with the chisel every few inches to break off the lip.
Clean up the broken edge so that no splinters will get in the way of the piece as it is fit in.
If your new pieces have tongues on the ends, cut these off as in photo 6.
Test the fit of the pieces in the floor. Use a short cut- off piece to compare the thickness of the new flooring with the old. If the new is thinner, shim beneath the new pieces with kraft or felt paper.
3. Install The New Flooring
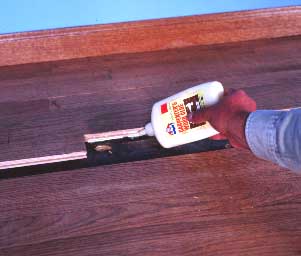
Put glue on the mating tongues and grooves of the new and old pieces as in photo 7, and slip the new pieces into place as in photo 8.
First place the tongue edge in with the piece at an angle, then push the other edge down flat. Place a piece of scrap wood on the new flooring and hit it with a hammer to seat it down as in photo 9.


Check to see that it does seat down to the level of the old flooring, without popping up. Use weights to hold the pieces down as the glue dries.
If hammering and weights won’t hold the pieces down, use finish nails as in photo 10. Pre-drill holes for the nails so they won’t split the wood.
Use a bit with a diameter slightly less than the nails themselves. Try to place the nails in the open grain areas of the oak, because there they will be less visible.
Cover the holes with putty and let it dry.
Make color tests with different stains on scrap pieces of oak flooring to find a color closest to the original.
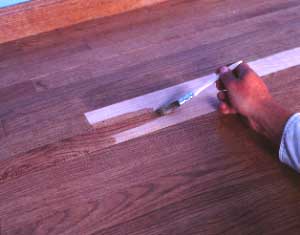
As you apply the stain to your floor, keep the stain on the new wood only, as in photo 11. Wipe the wet stain off with a cloth, let dry, then top coat with a flooring finish.
