Woodworking can be an extremely rewarding hobby. It can be productive, even profitable, while at the same time relaxing and meditative.
You’d be surprised at the quality of what you can produce with a very reasonable investment of time and money.
Are you interested in getting started in woodcrafts, but have no idea where to start and feel overwhelmed? Or maybe you’re on a budget and you don’t want to break the bank on a new hobby?
Read on and, hopefully, this article will provide a clear path to getting you started.
Contents
- Start with the Basics
- 17 Tips for Getting Started in Woodworking
- 1. Start with What You Have
- 2. Buy Tools You’ll Use Anyway
- 3. Start with Hand Tools Before Power
- 4. Invest in Small Power Tools Before Large Ones
- 5. Try to Find Quality Tools for a Good Price
- 6. Don’t Be Afraid to Invest in Quality for Heavily Used Tools
- 7. Check Garage Sales, Flea Markets, and Other Second-Hand Sources
- 8. Buy Tools and Supplies as You Need Them
- 9. Measure Twice, Cut Once
- 10. Label Your Cut Parts As You Cut Them
- 11. Cut Pieces a Little Larger Than Needed
- 12. Keep All but the Smallest Scraps of Wood
- 13. Keep Your Work Area Clean and Organized
- 14. Test Fit Joints Before Gluing
- 15. Try to Finish Each Project Before Starting Another
- 16. Make Friends with Other Woodworkers
- 17. Always Keep Safety First
- Conclusion
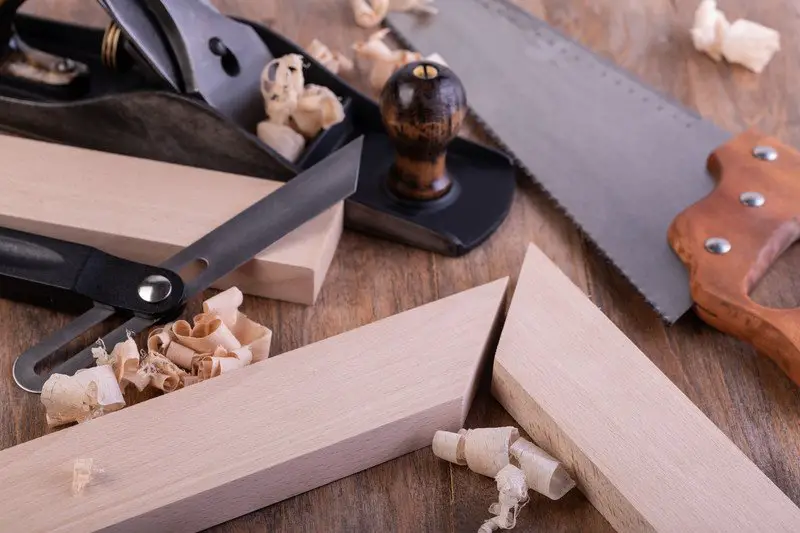
Start with the Basics
Basic Woodcraft Tools and Supplies
To begin the most simple form of woodworking, the only tools you really need are a ruler, a pencil, and a hand saw.
Use the ruler and pencil to mark some wood according to a plan, and use the saw to cut the wood to specification into the desired shape.
Add wood glue and some clamps and now you can join these shapes together to form more complex constructions.
Add sandpaper, a brush, and a clear coat and now you can produce a finished project.
You’ve just performed the basic steps of woodworking: marking, shaping, joining, and finishing.
From here, most tools you will purchase will still be performing these basic operations, only doing so more efficiently or in a more complex way not possible with simpler tools.
By starting with only the most basic hand tools required for each project, you’ll avoid potentially over-investing money and space into a new and possibly temporary hobby.
And, if you do eventually upgrade to power tools, you’ll have a deeper appreciation of what a power tool really does for you, and how woodworking was done before the invention of power tools.
Beginner Woodworking Projects
Now that you have a basic idea of what tools and supplies you’ll need, it’s time to select your first project.
Rather than getting overwhelmed by jumping into a large, complex project with lots of ornate details, complicated pieces, joints, etc., start woodworking with only the most basic projects.
These projects should be relatively small and simple, and not require any complicated cuts or joints.
This will allow you to focus on one or two skills at a time and build confidence with each success.
The following are some examples of simple projects which would suit the woodworking beginner
- Coasters
- Cutting Board
- Small Shelf
- Small Box
- Flower/Planter Box
- Serving Tray
- Wall-mounted key/coat hanger
Do you have a need for any of these items? Would any make a good gift for someone you know?
Choose one of these (or another small, simple wood object) and search around for plans for it. Choose the plans which best match your specific needs as far as style, size, etc. and get started.
Plans will usually tell you what wood to use. If not search around for what wood to use when making X object. You’ll usually find an answer and an explanation for why that wood is used for that object.
As you expand your skillset and tool availability, you can move on to more and more difficult and complicated projects.
17 Tips for Getting Started in Woodworking
Now that you’ve got a basic plan, follow these tips to set yourself up for success as you begin your woodworking journey.
1. Start with What You Have
Already have some tools and/or wood lying around?
Find a project you can finish with just what you already have on hand. It will save you money, a trip to the store, and help you declutter and use up what you have.
It also provides a limitation on what projects you can make, which could make the decision easier.
By limiting yourself to working only with what you already have, you can develop your creativity and resourcefulness. You will be forced to solve problems creatively instead of just buying the solution.
This tip isn’t for everyone though, because some people don’t have tools and wood lying around, and some people have a specific project they want to make. But for the right woodworker, it could be a fun idea.
2. Buy Tools You’ll Use Anyway
What happens if you start woodworking and then realize the hobby is, for whatever reason, not for you?
Instead of ending up with a garage full of large power tools to store or sell, stick with simple hand tools and hand-held power tools that will come in handy even if you don’t stick to the woodworking hobby.
Examples of tools which are useful outside of woodworking include:
- Electric Drill
- Hammer
- Square
- Rubber Mallet
- Simple Clamps
- Hand Saws
- Sanders
Etc.
These are all tools that can come in handy just performing simple home repairs and tasks, whether or not you continue with woodcrafts.
3. Start with Hand Tools Before Power
As stated above in the basics section, it’s probably wise to begin your woodworking journey with the simplest of hand tools.
It may make tasks take a little longer, but you’ll save money and space, and you’ll be able to take your time a little more on cuts while your learning.
And if you find out you don’t like woodworking, you just have a few extra hand tools that you could probably use for something else.
You’re also probably less likely to hurt yourself with hand tools than power tools (though any tool can do damage if used improperly).
You’ll know you’re ready for power tools when you’re performing similar operations frequently enough and you feel like the hand tools are slowing you down to the point where the extra cost in money and space of the power tool is worth the saved time and effort from owning it.
This timing will be different for everyone, as each woodworker has different goals, budgets, etc.
The weekend hobbyist could even stay with hand tools for life, while the profit-seeking woodworker will have to transition into power tools quickly to increase the productivity of his labor and maximize his returns.
4. Invest in Small Power Tools Before Large Ones
When you are ready to move into power tools, start with power hand tools before moving to large stationary tools.
For example:
- An electric hand drill before a drill press.
- A circular saw before moving to a table saw.
- An orbital sander before a stationary sander.
Etc.
The same logic behind starting with hand tools before power tools applies here too. You’ll save space and money by not over-investing until you know you’re ready.
As with moving from hand to power tools, when you find yourself performing the same operation over and over with small power tools and it still seems like there’s an inefficiency causing a bottleneck in your productivity, then it’s probably time to invest in a large stationary tool like a table saw or drill press.
As an aside, when you are ready and truly serious about woodworking, a table saw is an amazing tool and generally considered the centerpiece of the woodshop.
5. Try to Find Quality Tools for a Good Price
As with anything, you generally get what you pay for.
The same holds true for tools. There are exceptions, of course, but finding them can be tricky, especially considering online reviews can be corrupted.
Here are a few strategies you can employ when tool shopping to try to get decent quality without sacrificing on price.
Trusting a Brand
If you find a tool that seems to have a good quality to price ratio, you can generally assume other, especially similar, tools made by the same brand will offer similar results.
This isn’t always true, but it can be a helpful rule of thumb.
Trusting a Reviewer
You may come across a reviewer who has detailed information where he’s clearly used a tool, and competing tools, extensively.
He can provide a thorough list of the pros and cons of the tool in question and other available options.
Maybe you’ve taken his advice before when purchasing another tool and were satisfied with his recommendation.
In this case, you can likely trust this reviewer to guide you in your purchasing decision.
Trusting a Preponderance of Reviews
Although individual reviews can be corrupt, if you find a product with hundreds or thousands of positive reviews from multiple sources, the likelihood of these being fake is very small.
You can generally trust the product will satisfy your needs.
6. Don’t Be Afraid to Invest in Quality for Heavily Used Tools
If you find there’s a tool that you use frequently, don’t be afraid to invest in a truly high-quality item.
The heavy use of the tool means that even slight increases in quality and ease of use can offer a much greater return on investment in time and effort saved.
For example, if you spend $200 extra on a better tool that will save you an average of 5 minutes per week, you will have saved around 4.3 hours after a year.
If you value your labor at $around 20 per hour, that’s $86.66 saved in the first year or a 43.33% return on investment. Not bad.
On the other hand, if you rarely use a tool, it’s probably not smart to make the extra investment in the top-of-the-line model, as this investment will take much longer to pay you back in any time and effort saved.
7. Check Garage Sales, Flea Markets, and Other Second-Hand Sources
Sometimes a great way to find a quality tool at a great price is to check second-hand sources like garage sales, estate sales, classified websites, etc.
For the beginner, this strategy is probably best used with hand tools, which can more easily be judged for quality and condition than power tools.
If you do buy a second-hand power tool, make sure you are able to plug it in and try it out beforehand. Having trusted reliable brands can be helpful here as well.
8. Buy Tools and Supplies as You Need Them
Instead of running out and maxing out your credit cards on various tools, supplies, and materials, start with one simple project and purchase the items necessary for just that project.
Then as you move to another project, buy the necessary items for that one, etc.
By acquiring in this way, you’ll avoid the previously mentioned error of over-investing in a new hobby.
You’ll also avoid potentially cluttering up your space with items that you don’t end up using if you change your mind on a future project.
9. Measure Twice, Cut Once
It’s a bit of a cliche, but it really can’t be stressed enough the importance of double-checking your measurements.
It can be a real pain to have to start over on a nearly finished piece because it was cut too small.
This is especially important for projects where you only have a limited amount of wood or projects with complex pieces. In these cases, starting over could be extremely time-consuming, if not impossible.
So start off right by habitually double-checking your measurements and you’ll save yourself a real headache later.
10. Label Your Cut Parts As You Cut Them
As you make more complicated projects, you can run into situations where you make several cuts for several parts, only to find you’ve mixed up the various pieces and scraps from your cuts.
Then you have to re-measure everything to figure out what’s what.
A good solution is to mark/label your pieces as you cut them. If you use a soft lead pencil, you can easily sand off the label after if needed.
If you like jigsaw puzzles, you can ignore this advice.
11. Cut Pieces a Little Larger Than Needed
To account for sanding, cutting mistakes, and other potential issues, it’s generally good practice to cut project pieces a slight bit larger than the required size, especially for a beginner.
Remember, it’s much easier to remove more material than to add it back after it’s been removed.
12. Keep All but the Smallest Scraps of Wood
Even very small pieces of wood can be used to test, make jigs, inlays, plugs, etc.
Set aside an area for storage of small wood scraps. It could be a large bin or box, or a certain area of your shop/woodworking space.
Feel free to get rid of tiny little scraps though. Assuming the wood is untreated, you can use them for fire starter, mulch, or other uses.
13. Keep Your Work Area Clean and Organized
Built-up wood dust, scattered wood chips, disorganized tools, etc. can all become major problems in the woodshop.
Wood dust can get into everything, ruin your finishes, and even cause health issues.
Wood chips can get caught between things and mess up cuts and joint fittings.
Disorganized tools can be hard to locate when you need them quickly, or lost entirely for extended periods.
In all these situations, an ounce of prevention is worth a pound of cure.
The time and effort you save by being lazy are paid back ten-fold when problems arise.
And the time and effort you spend on taking care of these issues are paid back ten-fold in problem prevention.
For wood dust and chips, vacuums, ventilation/air filtration systems, hand dusters, floor brooms, and dustpans are all useful tools depending on the needs of your specific workspace.
For tool storage and organization, I prefer to hang up tools vertically as much as possible. This can be accomplished with wall hangers, wall hung shelves, or, less ideally, tall floor shelves placed up against a wall.
This keeps your tools easy to access and easy to put away, saves you horizontal space for other purposes, and keeps your horizontal surfaces clear and easier to clean up.
As far as when to clean up, there are many options for maintaining a clean and organized workspace. The system you choose will depend on your schedule and whether you want to do frequent, quick cleaning or less-frequent, more time-consuming cleaning.
At the more frequent end of the spectrum is post-operation cleaning. After each operation (for example, cutting, gluing, applying a finish, etc.), you clean up the items used in, and the mess made from, that operation. This results in quick cleaning but must be done frequently.
Another option is post-session cleaning. In this system, you would clean and organize before you leave your workspace after a woodworking session. This could take 1 minute or an hour or more depending on The basic idea is to never leave your workspace in disarray.
A final option is a calendar-based cleaning. This is where you clean your work area based on a calendar schedule.
This could be a certain day every week, every two weeks, certain days of the month, or even one day a month depending on how often your space needs cleaning.
You can even set a calendar application on your phone, tablet, or computer to remind you according to your schedule.
I think post-session cleaning is probably a good policy for most woodworkers. It requires less discipline than post-operation, and, unlike calendar-based cleaning, is done proportionally to how often you actually use your space.
So if you do woodwork for 7 days one week, and 0 days the next, you’ll clean 7 times that first week, and 0 times the next. It generally makes more sense, but each woodworker has a different situation and temperament and will need to decide for himself which system or combination of systems works for him.
14. Test Fit Joints Before Gluing
Always test your joint fittings before gluing.
This will prevent any surprises from coming up with glue on the pieces and assure you that you have all the clamps you need ready to go.
First, clamp your pieces together as if you were gluing.
If you find that you need to really tighten the clamp to get a good fit, you probably need to alter a piece. The most common cause of glue failure is putting unnecessary stress on the parts.
If you haven’t done so already, now is the time to mark where each piece goes. Even though some pieces are supposed to be identical, there are usually slight differences.
And since you know the pieces fit together properly in the current arrangement, why risk mixing them up?
15. Try to Finish Each Project Before Starting Another
It’s generally a good habit in life to finish one thing before starting another. Woodworking is no exception.
If you get in the habit of starting a new project before completing your current one, you could end up with a dozen half-finished projects cluttering up your shop and nothing complete to show for it.
And this clutter will make it more difficult to keep your work area clean and keep your tools organized.
Not to mention the hassle of keeping track of piles of unassembled cut pieces.
The point is keeping to one project at a time will make your life easier and generally produce better results, in woodworking and otherwise.
16. Make Friends with Other Woodworkers
A great way to improve your woodworking skills and make woodworking more enjoyable in general is to make friends with other woodworkers.
Join communities whether locally or online and talk to others with a similar interest. You will be able to ask for advice about your specific situation and eventually share your own tips and advice.
Learn from those more experienced than yourself. Nothing beats hands-on, in-person, situation-specific instruction and advice.
An added bonus of making friends with local woodworkers is that you’ll be able to share tools. If one woodworker owns a router table and the other a table saw, and they agree to share, they now both have use of a router table and a table saw.
You can also share access to plans, books, supplies, lumber, or any other woodworking item.
You’ll likely enjoy woodworking if you share it with others, and when you enjoy learning a skill, you will likely progress with it much quicker.
17. Always Keep Safety First
The most important tip for last: Always keep safety your first priority.
Wear appropriate clothing and safety gear. Take appropriate measures to protect against injury or damage to property. Always assume accidents will happen and prepare for them accordingly.
Research the standard safety procedures of any tool you use and follow them diligently.
Gloves, safety glasses, hearing protection, blade guards, fire extinguishers, etc. should all be used where appropriate. It’s never worth risking permanent damage to yourself or your home/shop out of laziness or carelessness.
Always make safety your first priority. And remember, it’s not worth doing if it’s not done safely.
Conclusion
Whew, well there you have it. You’ve got an introduction to the basics and a pretty extensive series of tips that should guide you in the right direction in your woodcraft path.
Don’t get discouraged if you make mistakes or seem to be progressing slowly, just keep at it and enjoy the process.
Keep experimenting and trying new things. If you feel you’ve got one type of joint down, try another. If you feel comfortable with one type of wood, try another.
Work your way up to larger and more complicated projects, and possibly selling your projects for profit, if that’s your goal.
Hopefully, now you’re ready to begin woodworking and make it a rewarding lifetime hobby.
Now go forth and make sawdust!