I have been getting a lot of question from beginning turners on drying bowl blanks and rough turning stock.
Most of the questioners seem to be having trouble with their bowls or other vessels developing cracks and checks.
With this article, I will try to give you some of the techniques that I and other acquaintances have been using successfully to minimize cracking and checking in our pieces. (Note: I said minimize, not eliminate!)
Why Does It Crack?
The first thing to think about in minimizing cracking is to minimize the stress of the wood. Cracks develop in areas that have weaknesses or because the wood is abused and needs to move to relieve internal stress.
Naturally, to minimize cracking, you want to minimize the stress. One caveat: some of your pieces are going to crack no matter what you do (so deal with it!)
When you begin the turning process, you need to select logs that are fresh or have been stored so that drying is controlled. Cut off the ends of the log and see if checks are deep.
If they are their in the starting material, they will be in the final product. Some woods are more forgiving than others. Our North Carolina soft Maple is very forgiving, but Apple or Cherry seems to delight in torturing the poor turner.
Other woods like Red Oak is very crackable, whereas White Oak is a little less fragile. Magnolia, Elm, Osage Orange, and some others don’t seem to crack as bad.
Log Storage
I normally split the log through the pith into two pieces after I get a log. Once the checking starts on the ends, it will progress rapidly through the rest of the log.
You can seal the ends, but this only prolongs to process, it doesn’t stop it. Once you have the log split, the wood can dry slowly and the stresses are relieved.
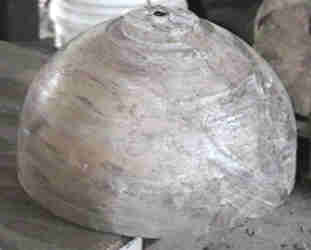
Roughing the Blanks
If you are roughing bowls or hollow vessels, you should get started right away. Turn the bowls thick using the methods in the bowl roughing article.
For hollow vessels, I sometimes will rough out the vessels between centers and bury them in shavings for temporary storage.
Drying the Blanks
There are a number of methods of drying rough blanks, but all of them do a similar task of slowly allowing the moisture to escape from the wood so the internal stresses of the wood don’t cause cracks to start.
The method depends on the moisture of the wood:
1. Very Wet to Moderately Wet
There are a number of good methods for the initial drying period. During this period, I would take a look at the blanks every few days to see if the drying process is working. In wet climates, they may rot faster than drying. In dry climates, I imagine they may dry too fast.
Check for checking and cracking and stop it with thin superglue if the cracks start. (If the wood is worth it.)
Store them in a pile of shavings in the shop for a month.
Store them in a paper grocery bag with wet shavings until dry to the touch.
Store them in a plastic bag and rotate the bag every few days.
Store them in a climate controlled cabinet specifically built for this.
Cover them with SealTite (end-grain sealer) and stack them in the shop.
2. Moderate Wet to Ambient
This is normally my last step since the bowls will end up in this type of environment after final turning. If the wood gets to ambient moisture content, then it will probably not move much more. For lidded boxes or other vessels in which parts must fit together, I would go to the Bone Dry methods.
Put the blanks in an air-conditioned room where it is much drier than outdoors.
Bring the blanks into your heated shop and store on a high shelf for several months.
Use a microwave (very carefully) to drive off the moisture. I wouldn’t recommend microwave drying since it is too fast for my tastes.
Use a dehumidifier in a small area.
3. Bone Dry
Use a kiln. This can be an insulted box with a heat source. We have had members who have built drying boxes from foam insulation as well as others who built them from used dishwashers and refrigerators.
They installed a light bulb with a dimmer and controlled the temperature to about 120 degrees F.
After several days at higher settings, the moisture is released and the dimmer can be turned down. From what people tell me, they have great success with this method.
This is a very worthwhile addition to your turning shop.
