My philosophy on woodworking is that the use of hand tools comes first.
Not because our forefathers did it that way, but because it requires the learning of the (IMO), most fundamental parts of good woodworking.
These are eye-hand coordination, tactile senses, and patience.
Also equally as important for those that want to use primarily machines, is the knowledge of what the machine is replacing and the achievable results expected.
That is, knowing what the hand tool can produce should lead to, at minimum, equal results.
Hand tools are divided into two basic categories, measuring and marking, and cutting.
Finishing could be considered another category, with tools consisting of brushes and rags.
Contents
Measuring Tools
To do woodworking one needs to be able to measure and to put a mark at the measurement, and to put a mark to guide the eyes as to where the hands should cut.
Tape measures, rulers, folding and straight are the mainstays of measuring but they are not always as accurate as should be.
When I buy a new tape I take an accurate steel ruler with me. I test the tape in both the pulling and pushing modes.
It is very important that a tape measure reads the same in both modes. By far the steel rules are the most accurate and everybody should have one of at least 6″.
I use a steel ruler for most critical measurements, such as setting a marking gauge.
A good steel square also has square ends which can be used as a mini-square, especially when you need a perpendicular mark from a straight line other than an edge.
While rulers are the tool to use for marking out a piece, a story stick is of benefit when having to mark several identical pieces.
It is simply a piece of wood of appropriate length and shape onto which you put all the necessary marks.
By placing this onto each piece you can accurately transfer the marks.
Human error comes more into play during the measuring process than any other. The story stick greatly reduces the possibility of error.
A square square is absolutely important but not always that easy to find.
To check for square, place the square against a straight piece of material which is at least twice as long as the heel and at least as wide as the blade, plywood, particleboard, etc.
Draw a line with a sharp pencil or knife, reverse the square on the same edge and bring it to the line.
If it is the same it is square, if not it isn’t.
It is good to have more than one size square. Of course, everything isn’t made square.
A handy tool called a t-bevel is of great value for laying out lines at different angles.
It is like a square except the blade is loose and can be set to any angle and then locked in place.
Of course for angles that are not square one needs a way of finding this.
Those into geometry can find most any angle by using drawing tools but I prefer to use a protractor.
Marking Tools
The two most common tools for marking are a pencil or knife. They both have their place.
A pencil will leave a very visible mark or line that can be easily removed. I prefer to use a mechanical pencil .05mm.
This type of pencil never needs sharpening to produce a fine line. A fine line is needed to get accurate results.
A knife will produce the finest line but is more difficult to remove.
A cut line is invaluable as an aid to guide cutting tools such as chisels, and fine saws.
There are special tools called marking knifes which excel at cutting a line against a straight edge.
They are flat on one side and beveled on the other, the flat side is held against the straight edge and the bevel acting as a wedge helps keep the tool tight to the straightedge.
Care must be taken when marking, that the marker doesn’t follow the grain as it tends to do.
A marking gauge is a device that holds the marking tool on an adjustable rod or stick, which goes through a block that is used as a fence.
It is a great tool for marking lines parallel to an edge.
There are many varieties of this tool, some with more than one marker, called a mortise gauge, for quickly laying out mortise and tenons.
These tools are easy to make and are a good beginning project.
Cutting Tools
Cutting tools are of three general types, chisels, knives, and abrasives.
Abrasives?
Yes, abrasives are both hand tools and cutting tools.
However, the cutting tool used most is the chisel.
Besides the chisel which we call a chisel, a saw and a plane are both chisels.
Knives are used most for carving and marking, yet a chisel is actually a type of knife.
Confusing? yes.
So woodworkers decided to name each type of knife separately.
While a plane is just a device for holding a chisel to facilitate removing a pre-determined amount of wood consistently, it’s cutting tool is called a blade.
Saws are the backbone of the woodworker.
With a saw, one can transform a tree into lumber and lumber into specifically sized pieces for a project.
The saw is just a whole lot of chisels on a blade.
There are many types of saws and each performs two basic functions, ripping or crosscutting.
Some are very coarse and some very fine. Some have backs to help keep the blade straight.
One should have a crosscut, a rip, and a backsaw, at the minimum.
The saw is perhaps the hardest tool to master, it sometimes seems to have a mind of its own and meanders all over the board.
And worse, a fine toothed saw which goes astray doesn’t want to come back.
First, it is very important that the saw be sharp and the set is equal on each side.
You should be able to look down the edge and see a perfect little valley between the teeth. If the set is off the control is more difficult.
Your stance is very important in sawing, try to keep your body perpendicular to the floor and the cutting line either 90 or 180 degrees, depending on the operation.
If you want a square cut you should be square with the board.
Feel is very valuable here, when you feel the slightest bind you can assume that you are going off.
The object is to make smooth even strokes without any bind.
Take slow steady full strokes, fast short strokes only wear you out and produce less than satisfactory results.
If you have never tried a Japanese style saw, you should at least give one a try.
IMO for fine work, they are unbeatable.
I prefer western style saws for cross-cutting and ripping boards but for making joints and sawing small piece of wood such as inlay, I find the Japanese style superior.
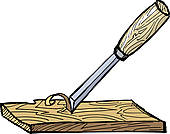
Chisels
With a chisel and saw you can make practically anything.
Chisels are essential in joint making and fitting. There are two common types, cabinet and mortising.
Cabinet chisels are fairly thin and have beveled edges. They are the most useful all around type.
Mortising chisels are thick with square sides and are best for chopping mortises. With both it is essential to flatten the backs.
I prefer to hollow grind cabinet chisels and flat grind mortisers. I feel that a hollow grind gives a finer cut and curls the wood better.
While a flat grind is tougher and with a micro- bevel added it turns the wood well enough.
I would say that more injuries have been caused by a chisel than any other tool.
And most of these injuries are stabbing a hand that is in front of the chisel. Somebody named `they’ says that a dull tool is more dangerous than a sharp one.
I assume the theory is that you push harder to use a dull tool thus losing some control. However, I doubt if `they’ ever had a real sharp chisel in their use.
A properly sharpened chisel will cut anything it touches even slightly. And the most important aspect of a chisel is that it be properly sharpened.
Learning control is very essential in the proper use of a chisel.
Never put your hand, leg or any other body part in front of the blade until you have developed proper control. And then only when necessary.
Laying a chisel on it’s back will allow you to make thin paring cuts, but it will dig in easier.
With the bevel side down you can take more aggressive cuts and control of digging is easier, while general control is lessened.
Using blocks of wood cut to the proper angle as a guide will be of great assistance in getting near-perfect cuts.
For example; When I cut the space between the tails and pins of dovetails, I often use a square edge board as a guide.
After sawing the angle cuts, I clamp one across the line which marks the bottom of the cuts and then I rest my chisel against it while using a mallet to cut the waste.
This assures both a square and a straight bottom.