The following is an examination of when and how (and why) to hand plane rough wood boards.
Hand Planing vs. Power Planing
Most woodworkers think of “planing a board” to mean running it through a power planing machine, and this does take care of the majority of our woodworking needs.
But we should remember that the “planer” is really not a planing machine at all.
It is a single side power surfacer, which grabs the boards with considerable pressure under a set of spring-loaded rolls, feeding it as it slides over a relatively short table (compared to a jointer) under a set of rotating knives.
Since the table is short, the board will come out with about the same curvature as it had when it went in.
And since the rollers press a board flat across its width while cutting, when the board emerges it will spring back to its natural cross-curvature.
For ordinary work this is not important, but if you are dealing with a valuable piece of wood, and looking for a finished board which is straight and really flat you cannot use the “planer” by itself.
Good shops always run work over the long-bed jointer which gets the bottom side straight, then the planer does what it is designed to do.
It cuts the top side smooth and ensures that the work is of even thickness. It is for this reason that the machine is called a Thickness Planer, it is designed to cut to a given dimension of thickness.
But if you have a board wider than 12 inches, you will have a hard time finding a jointer which cuts wide enough.
And if your board has cross-curvature, your thickness planer will simply not do the job.
So here is a case where you might consider going back to the old-fashioned time-proven method of “planing down your work by hand”.
A Hand Planing Story
Last year I was looking at a beautiful six foot long mahogany board which had a slight cross-curvature, it was 24 inches wide and had been aged in my shop for nine years so I knew it was stable by then.
I didn’t want to take to a mill which had a 36″ planer because I knew the board would spring back after it left the rolls, and I was also nervous about losing too much of the thickness in the process of getting a clear surface, so I figured to do it by hand.
First I had to have a straight edge I could trust, so I ran two six foot strips of hardwood plywood across my long-bed jointer to get a reliably straight edge, and was satisfied when the two edges matched up light-tight.
I cut one in half for convenience in working the cross dimension.
Rough Board Hand Planing Video
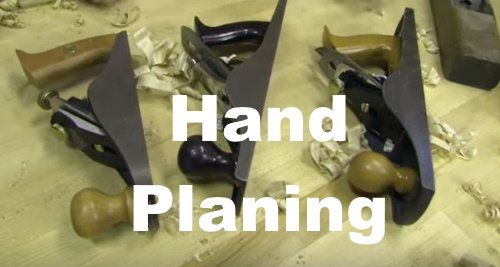
Hand Planes
Now let me pause for a moment a run through a description of the various types and sizes of planes which one can find at hand, and then return to my experience with my mahogany plank.
Hand planes come such in a bewildering number of sizes and shapes that it is easier for the collector to know which ones are valuable and which not, than for the user to know which to use for a given job.
Block Plane
The small Block Planes with a length of about 7 inches, the little fellows which fit the grip of your hand without a handle, are used for working down surfaces for finish, but they are not intended to make boards “plane”, a job reserved for the longer member of the family.
The common block planes are the low angled ones like the Stanley 60 series, when properly sharpened to a razor edge they will work cross grain at the end of a board reasonably well.
The Stanley 9 1/2 or various Sargent models have a slightly less acute cutting angle, work well on flats and edges but are less effective on cross grain.
Then there are the common models with a higher angle to the blade which are fine for general work, excellent for edges and bevels, and in some ways better than the low angle plane for glue-up work since they leave a fine, open-pore surface for gluing. But they balk at any across the grain work.
Wood Block Planes
Also there are wood Block Planes, made from a solid block of wood, whence the name. These are the old-fashioned style, with wedged blades which must be cautiously tapped into place for adjusting the cut. These are larger than the small cast-iron planes, they are nice to feel in the hand, they have a touch of history to them.
They rub a wood sole smoothly on the wood work, and are not to be despised. They are fine for the leisurely woodworker who has a feel for his tools and knows how to tap a blade into place, but not for the man in a hurry.
Smooth Planes
Next in size are the Smooth Planes, a little larger than the Blocks and averaging nine to ten inches in length. But there is a vast difference. The blade angles are generally about 40 degrees, they have a tall gripping handle at the rear and a hold-down post at the fore, they are used for smooth finishing work to be ready for sanding or scraping down.
The Stanleys are a good example of the range, (excluding the rare #1 Smooth which sell high for collectors) but the ‘#3 and especially the #4 are found easily and after their bases are lapped out to counter shrinking of the cast metal over the years, they are the most useful of the smaller planes. (But they will not do well in a tangle of upstanding grain, where you will go back to your very low angled Block Plane to slice through it decently.)
There are many other brands, all virtually identical in use and performance, don’t be a snob and ignore a nice, clean Craftsman from the ’50’s, a Sargent or an un-named interloper.
If the base is flat and the blade is there, they will all do the same work with the same hands.
Transitional Planes
Now, in this same class are the so-called “transitional” models, which nobody seems to understand or want. They have a wood base onto which is screwed a nice cast-iron plate which has a blade holder and screw adjustment about the same as on an all-iron plane.
They responded to the notions of older craftsmen who didn’t like the idea of rubbing iron onto their woodwork, possibly because iron in an unheated shop quickly picks up mild rust which can rub off as red and appear in the new water-based finishes.
Or it may have just been a whim. But these planes have wonderful possibilities.
I made a long variety of a Transitional with a long carefully prepared board into a shooting-board-plane, moving the handle to the side at an angle, and it serves a harpsichord maker perfectly for edging the sections of his soundboard for gluing.
It is truer than a power jointer and leaves the grain perfectly open for glue.
There are other conversions for Transitionals, with a board screwed to the side accurately, they can make an edge joint at a perfect right angle just as well as a power jointer, and you never have to worry about the fence setting, since it is fixed at 90 degrees!
Jack Plane
Going to the next class we find the Jack Planes like the Stanley #5 which are used for hard work, removing stock fast and leaving finish to the next stage of work, although when sharp they will finish fine.
Jack planes run about 14-18 inches long, they will obviously not dip into the low spots but cut the highs well enough considering their medium length. In style they are designed as bigger cousins of the Smooth planes, the parts are just a little larger and heavier, the blades are wider, and they are build stouter for heavier work.
Fore Plane
Their larger brother is the Fore Plane (the Trying plane in the UK English terminology), which runs pretty near to 18 inches in length, of which the Stanley #6 is a good example.
I really don’t see much useful difference between these two sizes, there is only a couple of inches difference and they do the same work equally well.
Weight might be the main difference, and unless you are trying to line up a complete Stanley Series, I suggest having the one or the other depending on what you find around.
You know the little stamped iron lever which sticks out over the handle to shift the blade sideways on iron planes?
If you find a plane without this level and it is cheap, get it because you can sell it to a collector as an “early model” pre-lateral.
But if for your own use, you want this adjustment which comes in real handy.
Now remember that there are solid-block wood planes in these two sizes galore, running from about 15 to 20 inches, and although they take a lot of care tapping the blade into place accurately, they have one great advantage.
When you first get one which looks solid without deep cracks, after removing the blade and wedge (!), run it over an accurate power jointer with a very light cut.
Now you will have a Perfect Sole, accurate to a thousandth of an inch, something which you can’t get with an iron plane, without a lot of hand lapping or machining. (I don’t recommend truing up an iron plane on a surface grinder, because the plane inverted is a devil of a thing to chuck up solidly.
And the least bit of heat will warp the iron, so although true when finished, it may be cupped slightly the next week.)
Wood planes will warp a bit, but very slightly in well aged hardwood, and after the first jointing, a little fine sanding on a plane surface like your table saw top, with fine sandpaper taped in place will restore it.
Jointer Planes
Jointer Planes are the longest members of the family, they generally run from 22 to 24 inches in the iron models, Stanleys #7 and the two inch longer #8 are good examples.
The name implies that they are to be used for making up glue joints, which they will do well for planarity, but since they have no way of assuring levelness when planing other than your eye and hand, they are not really reliable for this work.
The power jointer is always better (if sharp, to avoid crushing down open grain which the glue needs) and the fence is set accurately.
On the other hand if you want to hold to hand-work, get a long solid-wood bodied jointer plane.
(The sizes go up to 32 inches in length, but use an 18 incher for this.)
Joint it on the sole and then one side square to the base, and screw on a flat board to maintain squareness of your glue surface.
(Rabbit out a section of the board to allow for the width of wood on the plane beside the blade edge. Or leave the board straight and glue on a 1/4″ strip of plywood.)
If you are right handed put the board on the right so you can press it hard against the board, or vice versa.
But I have a much better use than edging for jointer planes, which is working the whole surface of a board to flatness, and this can be done without removing any more of the thickness than absolutely necessary.
Rabbit Plane
I want to mention one kind of plane which is hard to find, which you can make for yourself without much trouble or cost.
This is the small Rabbit Plane which you are always wishing for to clean up or enlarge a rabbit which has been sawed out on the table saw.
I suggest taking a 3 ft. piece of hardwood, perhaps 1 1/4 thick and 3 inches wide, and cutting out on the table saw a half inch deep slot for a half inch wide blade and its locking wedge.
If you cut the support angle to 40 degrees and the wedge angle to 35, and clean out the material between with successive saw cuts, you will be ready to fit in your blade and make up your wedge to lock it.
I suggest sawing the wedge rough and belt sanding it to a perfectly tight hammer fit.
By cutting this from a long piece of stock you can use your table saw miter gauge, you have enough material to hold onto, to cover some errors, and to make a second plane for the other direction.
When done leave enough for a carved knob, a squirrel tail as many older ones have, or simply cut if off flush.
It would be good at this point to continue and make another plane going the other way, you always have changes in the grain or have to work to the opposite corner.
For the blade, get a length of 1/2 x 1/8 in. WI or O1 (water or oil hardening) stock, and read my other section on hardening and tempering steel.
You will want to sharpen the blade on bottom and side of course, and a sheetmetal screw threaded all the way up aimed at the edge of the blade will adjust it micrometrically from the far side.
A pair of these planes is indispensable, the antiques Stanleys in a pair are astronomically costly, and these will cost you only an hour or two and a length of tool steel.
Back to The Hand Planing Story
Now let me go back to my original project of hand-planing out a wide mahogany board.The board I had on my worktable was six feet long, five fourths thickness, with about an eighth inch of longitudinal curve and just a little twist.
But there was almost an eighth inch of cross-curve which is what made me decide to do the planing up by hand, since I wanted the thickest dimension I could come out with for my table-top.
The surface was the original mill cut, rough and hairy, so the first tool I put my hand to was the scrub plane
This scrub plane was a solid block plane about nine inches long, its sole was two and a half inches across with under an eighth inch roll, and the blade was matched to this curvature.
I tapped the blade into a light cut, and started out removing the obvious high areas in long, fast sweeps at about twenty degree across the grain. Since the plane cut a chip which was paper thin at the edges of the cut there was not much chance of tearing.
I went at it with energy, first working down the high center and turning the board over onto two strips, I started cleaning down the high edges.
I was surprised how fast this went, in ten minutes I had a relative degree of flatness established, although the surface was hilly from the scrub plane cuts.
For this kind of preparatory work there is nothing like the scrub plane, because it lifts its chip from the middle and simply can’t tear out at the sides. Clever, these old plane makers!
Now I made the big jump to a long “jointer” plane, again a solid wood plane 30″ long, I chose this long one because I wanted to reach right across the board, working at an angle of about 40 degree.
I tapped the blade into position with the right side of the blade barely cutting and the left side making a very modest chip.
Then starting at the right side of the board’s length, I proceeded down the length with 40 degree angled cuts right across the width.
I kept the cuts close, just chipping away at the length carefully, and in a few minutes I was down at the other end.
Now I turned the board around and did it again right to left so as to cross-pattern my first cut.
With the two high edges up it was fairly automatic cutting, but when I turned the board over I had to be careful to keep my planing on that high center.
So I went to my Stanley #7, which was lighter and easier to work with its two handles, I balanced the blade tilting it as above, and worked down the center crown.
When this was almost flat, I went back to the wood-bodied Longfellow, working down from right to left and this time continuing until my cuts just about reached the edges.
Again turned the board around and cross-sliced at the reverse angle.
Now I checked with my straight edges, marked the highs with soft school-chalk which don’t dull blades, and worked these over with my #5 until there wasn’t much need for chalking anymore.
At this point many people would give it a once-over the belt-sander, which would do a good job except for two things:
Wood powder would be crushed down into the open grain hiding the glory of the finish, and also there would be particles of the abrasive worked into the grain. So I kept going with the planes.
At this point it was time to smooth out the small highs which remained, so I went at it with a Stanley #4, first sharpening the blade on the belt sander to a nice even edge without the roll you often get with a stone, and polishing it on my hard-felt wheel with abrasive rough stick.
I always relieve the corners of a plane blade used for fine finishing like this, just stoning off a tad so the blade doesn’t leave one of those edge marks which are so hard to get out.
Now I went over the whole surface, smoothing with this “smooth plane” in its proper function.
(The Smooth is often nothing more than a dull-bladed tool thrown in the carpenter’s tote box for use on a sticky door edge.)
In a few places I had to watch where grain wanted to come up a bit, so I switched for those areas to the low angle block plane (my Stanley #60) working cross to the curly grain so as not to lift it, just shear it off precisely.
At this point you would be ready to sand it.
I decided which would be the down side for my table-top and went over it with the random-orbit sander at 180 grit, then 220 grit, and it looked just fine.
But I wanted to see if I could do better for my top surface, even if it took half an hour more, so I went to my scraper box and selected one with inch and a half width, corners relieved a tad, re-rolled the edge and did a final finish just by scraping.
Much old furniture was done in this way, by leaving the grain open and un-cluttered with wood powder.
The light which penetrates a clear finish has a way of getting caught in the micro-traps of the grain and reflecting outward in a magical glow.
This is similar to that unmistakable brightness you see on a bluejay’s feathers, the result of light poured over micro-traps of the feathers, the size of these minute apertures measured in millionths of an inch, generates the color “blue”.
There is much to be learned about the way certain wood radiates light, and I suggest experimenting with scraped as compared with sanded surfaces to see what you can find out.
Was it worth it?
Was all this work with the mahogany board worth while? Yes, and there are three reasons:
First, I was able to get the maximum thickness out of my board by proceeding carefully and selectively.
This took time but I preserved my material, whereas from previous experience I believe that if I had taken it to the mill where they do have big equipment, I might well have ended up with a much thinner board.
They are in business to turn out work fast, a quick adjustment could cost me an eighth of an inch gone to chips.
Here the consideration was for safety of my material.
Second, I knew that such a wide board would be pressed flat by the rollers and would curl back when the work came out.
There is no way out of this dilemma.
Third, the finished surface of my carefully worked board has a touch of handwork about it, it is in fact not as flat as a machine could make it.
There are very minor shifts in the surface which you can’t really see in the reflecting satin finished surface.
But the table-top is somehow perceivable as a hand-made object, there may be a softness about it which reminds you of the way it was made.
Oh yes, one thing I forgot to mention.
When I cleaned up the shop and swept up a basket full of paper-thin mahogany shavings, and put the Stanleys back on their shelf all lying comfortably on there sides as they should be.
And finally set old 32 inch Longfellow pridefully back in a high place to wait for the next time I had to call on him.
I felt a sense of pride in doing that job in an historical, old-fashioned way.
Conclusion
And at the same time I noted to myself that I had really done it carefully, correctly.
The time spent seemed to have passed in a flash, the work was totally engrossing and totally enjoyable.
It was the sheer pleasure of using both mind and hands, and the ancient business of working with wood.
Thanks for the article. I have a quick question. What is the best type of sander for sanding a deck? My current belt sander just broke on me right in the middle of refinishing my dad’s deck. Thanks in advance for your answer. 🙂
For small/medium decks, a belt and/or palm sander are generally considered adequate, though time-consuming. Using a decent sized belt sander and then hand-sanding the details might give a good cost-to-performance ratio.
For larger decks (or to save some time), you could rent or purchase a floor sander, but you’d still have to do the detail work between planks, etc.
So it really comes down to the size of your deck and if the time saved with a floor sander would be worth the extra expense and hassle.
Hope that helps. Good luck!